


The Automated Server Power Control Tool for Cisco Intersight automates the power state of multiple UCS servers managed by Intersight. Quickly perform “Power On”, “Power Off”, “Power Cycle”, “Hard Reset”, “Shutdown”, and “Reboot CIMC” operations on large groups of servers.
-
Python 3.7 or higher installed, which can be downloaded from https://www.python.org/downloads/.
- If you’re installing for the first time on Windows, select the option “Add Python 3.x to PATH” during the installation.
-
Install the Cisco Intersight SDK for Python by running the following command:
pip install intersightMore information on the Cisco Intersight SDK for Python can be found at https://github.com/ciscodevnet/intersight-python.
-
[Optional] If you already have the Cisco Intersight SDK for Python installed, you may need to upgrade. An upgrade can be performed by running the following command:
pip install intersight --upgrade --user -
Clone or download the Automated Server Power Control for Cisco Intersight repository by using the
 link on the main repository web page or by running the following command from the target directory if Git is locally installed:
git clone https://github.com/ugo-emekauwa/intersight-server-power-controlIf you are downloading the repository file as a zipped file, unzip the file once the download has completed.
-
Generate a version 3 or version 2 API key from your Intersight account.
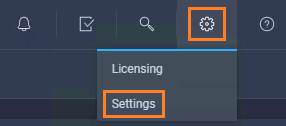
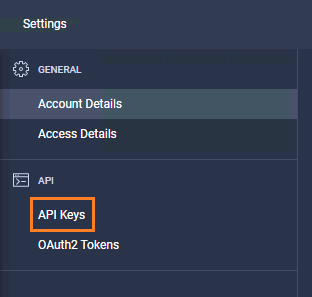
(a). Log into your Intersight account, click the Service Selector and select System.

(b). Under the API section in the work pane, click API Keys.

(c). In the API Keys section in the work pane, click the Generate API Key button.

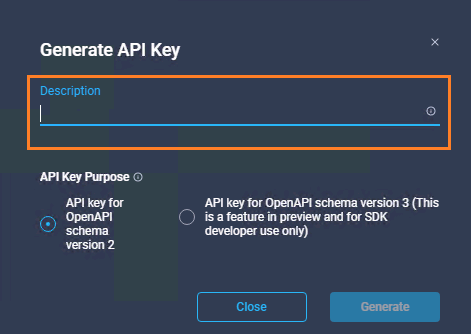
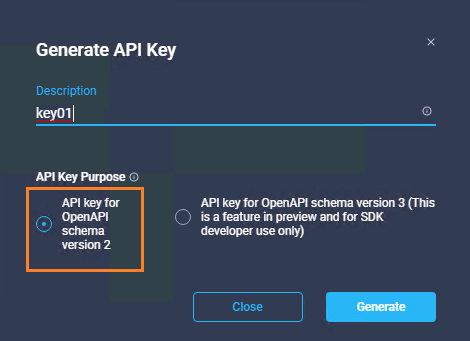
(d). In the Generate API Key window, enter a description or name for your API key.

(e). In the Generate API Key window, under API Key Purpose, select a version 3 or version 2 API key.

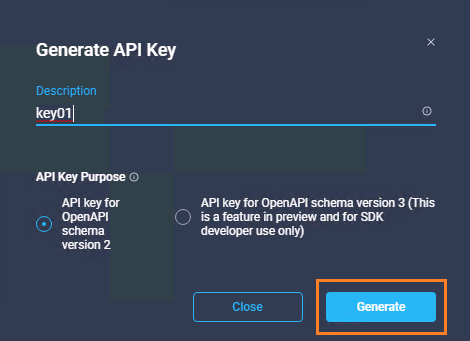
(f). In the Generate API Key window, click the Generate button.

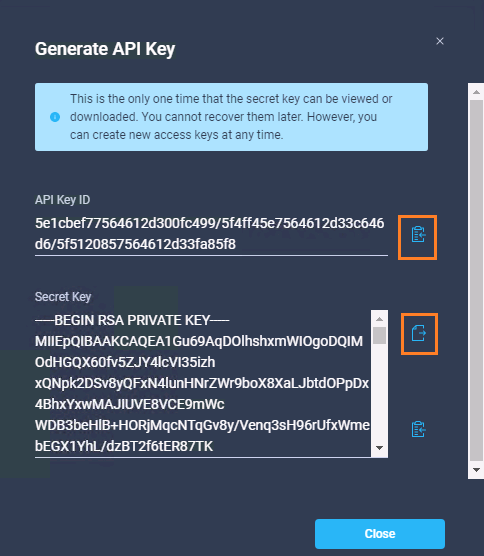
(g). In the Generate API Key window, a new API key will be generated. Copy the API Key ID and download the Secret Key to a secure location.


-
Please ensure that the above Prerequisites have been met.
-
Within the unzipped Automated Server Power Control for Cisco Intersight repository, navigate to the intersight_server_power_control.py file.
-
Edit the intersight_server_power_control.py file to set the
key_idvariable using the following instructions:(a). Open the intersight_server_power_control.py file in an IDLE or text editor of choice.
(b). Find the comment
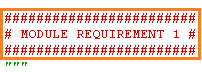
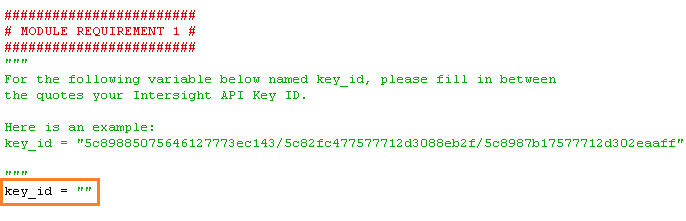
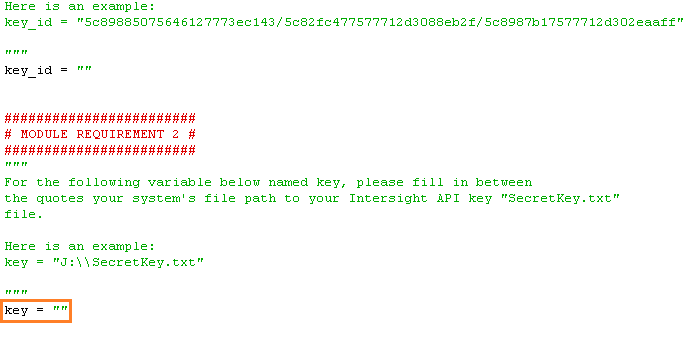
# MODULE REQUIREMENT 1 #.
(c). Underneath, you will find the variable
key_id. The variable is currently empty.
(d). Fill in between the quotes of the
key_idvariable value with the ID of your API key. For example:key_id = "5c89885075646127773ec143/5c82fc477577712d3088eb2f/5c8987b17577712d302eaaff"
-
Edit the intersight_server_power_control.py file to set the
keyvariable using the following instructions:(a). Open the intersight_server_power_control.py file in an IDLE or text editor of choice.
(b). Find the comment
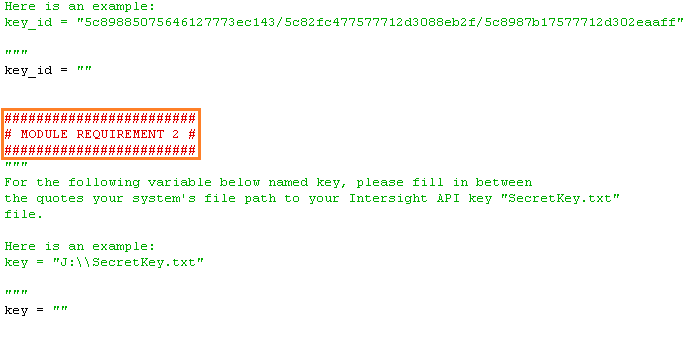
# MODULE REQUIREMENT 2 #.
(c). Underneath, you will find the variable
key. The variable is currently empty.
(d). Fill in between the quotes of the
keyvariable value with your system’s file path to the SecretKey.txt file for your API key. For example:key = "C:\\Keys\\Key1\\SecretKey.txt"
-
Edit the intersight_server_power_control.py file to set all the configuration variable values using the following instructions:
(a). Open the intersight_server_power_control.py file in an IDLE or text editor of choice.
(b). Find the comment
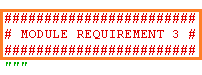
# MODULE REQUIREMENT 3 #.
(c). Underneath, you will find the instructions to edit the configuration variable values to match your environment. Each variable has a sample value for ease of use. The variable values to edit begin under the comment
####### Start Configuration Settings - Provide values for the variables listed below. #######.
Completion of editing the configuration variable values is marked by the comment
####### Finish Configuration Settings - The required value entries are complete. #######.
-
Save the changes you have made to the intersight_server_power_control.py file.
-
Run the intersight_server_power_control.py file.


The Automated Server Power Control Tool for Cisco Intersight is used in the following demonstrations and labs on Cisco dCloud:

dCloud is available at https://dcloud.cisco.com, where Cisco product demonstrations and labs can be found in the Catalog.
Here are similar tools to help administer and manage Cisco UCS and Intersight environments.
- Cisco IMM Automation Tools
- Automated OS Install Tool for Cisco Intersight
- UCS CIMC Certificate Renewal Tool
Ugo Emekauwa
 https://github.com/ugo-emekauwa/intersight-server-power-control